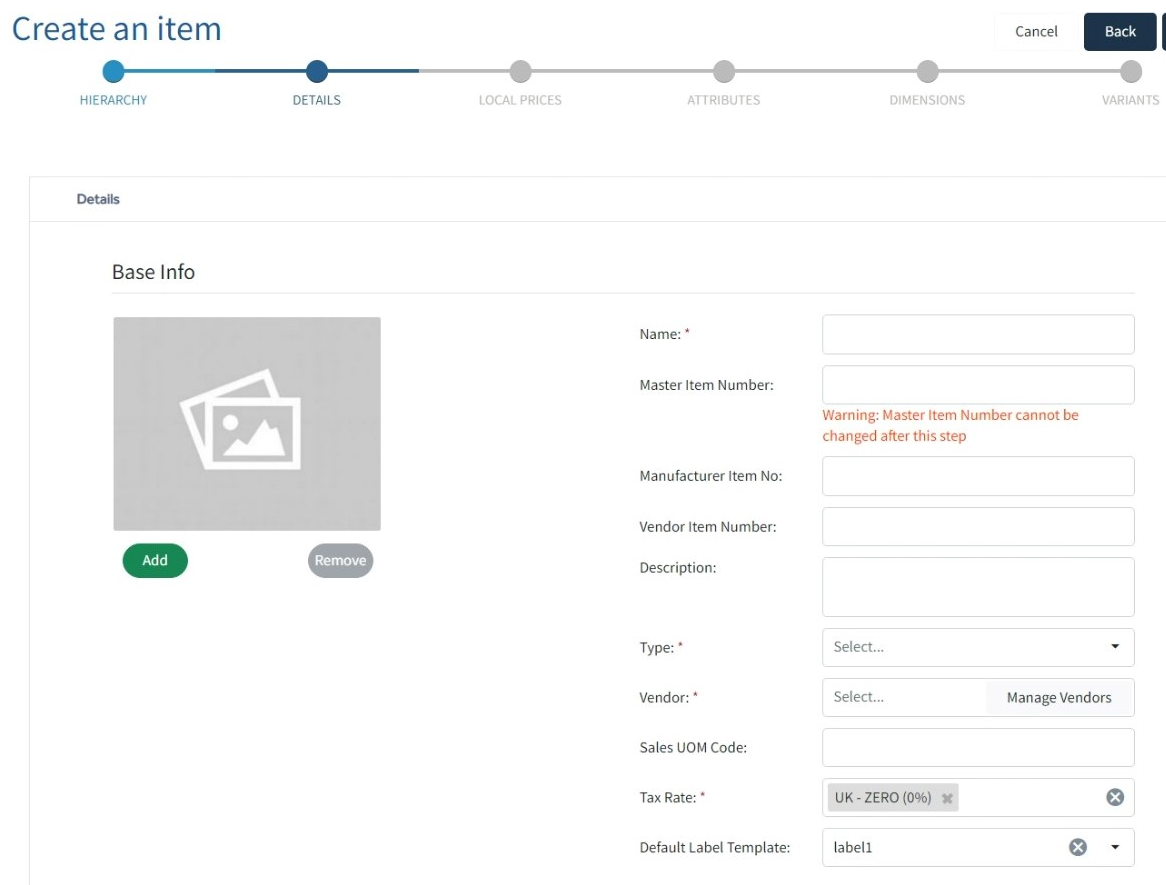
Details
This is where you add all the main information about the item you are creating. Complete each field as required, then Next to move to the next step.
NOTE: If creating an item with variants, some variants may have slightly different information, however, enter the most common value, then change as required at Step 6 – Variants. e.g., Vendor Item Number per colour, variant item number, price per size.
NOTE: (*) Indicates a Mandatory field.
|
Name* |
This is the Master Item Name. Used by the Item List and parts of Imagine where the items are listed at Master Item level instead of variant level [Colour and Size]. |
|
Master Item Number |
The number or code by which the master item will be known or referenced by. It will appear in most lists and reports where the master item is listed. NOTE: If left blank, it will automatically generate one for you |
|
Manufacturer Item Number |
If required, the Manufacturer number or code by which the master item will be known or referenced by. |
|
Vendor Item Number |
If Required, the Vendor number or code by which the master item will be known or referenced by. |
|
Description |
This field is an extended description of the Name field and is commonly used to hold more descriptive information about a product. Material type, weight, size, artist information, design notes etc |
|
Type* |
|
|
Vendor* |
This is who supplies the item, sometimes referred to as the Supplier. Select an existing Vendor from the list. If No Vendor exists use the Manage Vendors button to create a new Vendor. NOTE: Only the Vendor Name and Vendor Code is created. All other Vendor details should be added in the Back-Office – Vendors section. |
|
Sales UOM Code |
UOM is a Unit of Measure by which an item is sold. This could be weight, length, pack size or something else. Currently this field is for reference purposes only. |
|
Tax Rate |
This is the Tax Rate to be applied when the item is sold. If there are multiple Tax Groups, select a Tax Rate from each as required. Only 1 tax rate can be chosen from each group. |
|
Default Label Template |
This is the label format which will be used for label printing unless an alternative format is selected at the time of printing. For more information see @ Label Templates |
|
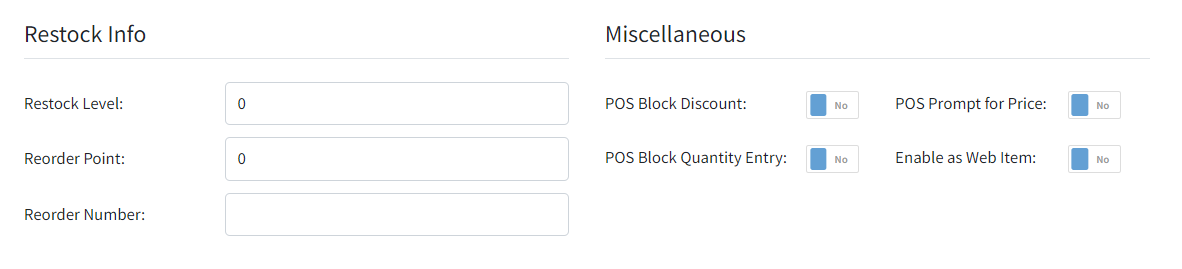
Restock Level |
This is the maximum amount of stock to hold for the variant item. Currently this field is for reference purposes only. |
|
Reorder Point |
This is lowest amount of stock to be held for an item. It indicates when an item requires ordering again. |
|
Reorder Number |
If required, the Re-order number or code by which the master item will be known or referenced by |
|
POS Block Discount |
When set to YES, the item is blocked from being discounted at the POS. Default setting is NO – Item can be discounted |
|
POS Prompt for Price |
When set to YES, a prompt appears at the POS asking the user to enter a price. Default setting is NO – Item is not prompted for a price. |
|
POS Block Quantity Entry |
When set to YES, the user cannot change the quantity of the item being sold. Default setting is NO – A quantity can be set against the item. |