View and Edit Item
Summary -
Allows you to see whether the item is active, the Sales Price and the Unit Cost
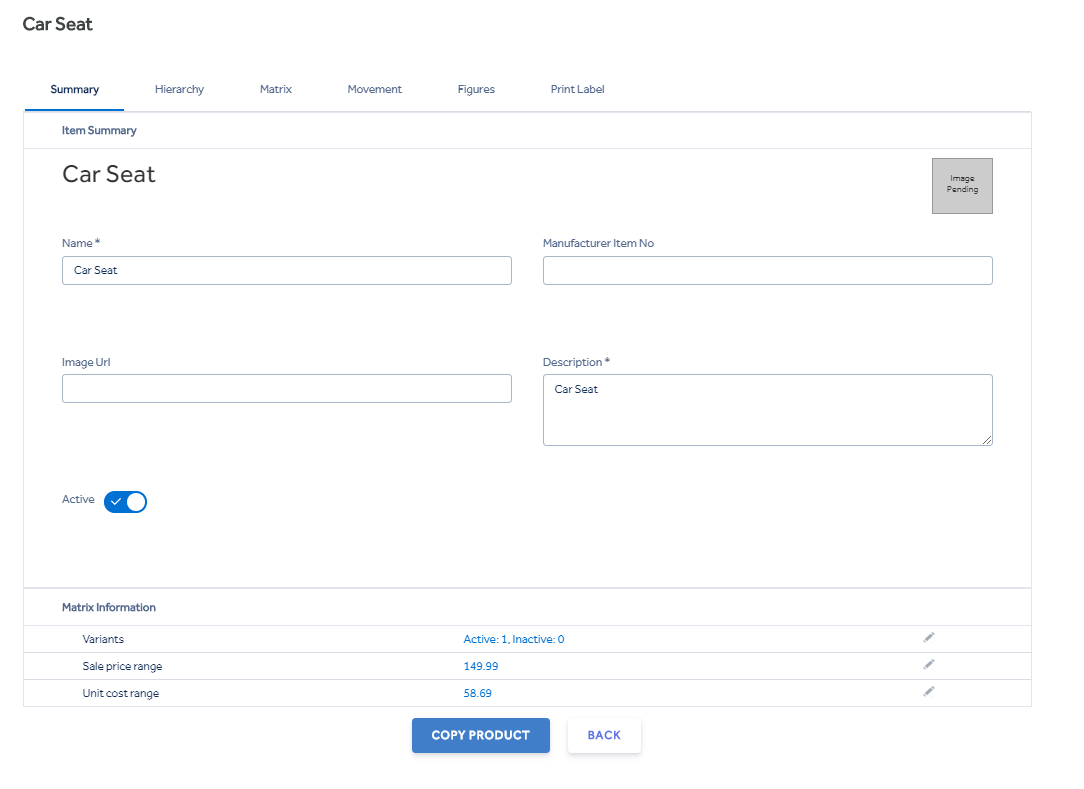
If you select  next to each of these this will take you to the Matrix tab. See Matrix Below.
Additionally, there is a  button on this screen. Clicking this will create you a duplicate of the product with unique numbers and names.
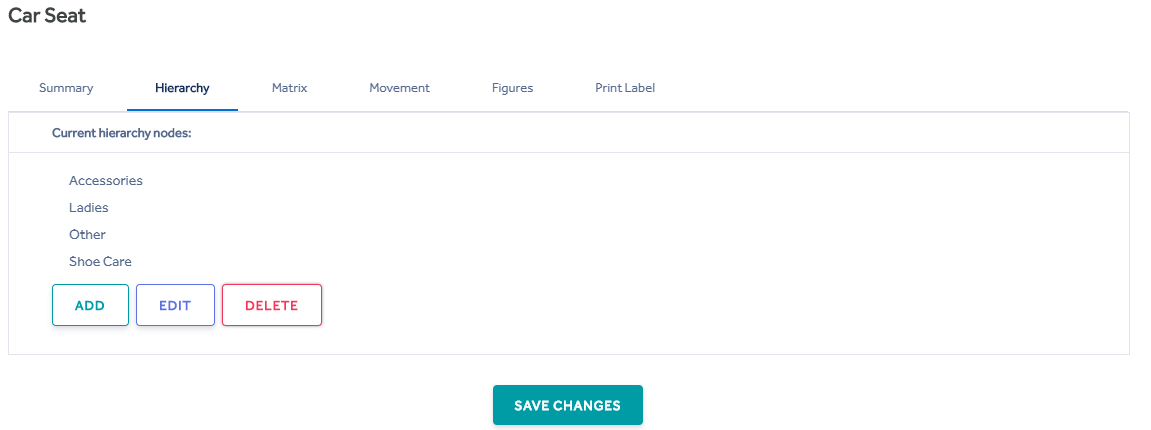
Hierarchy -
This is where edit the parent/child nodes for your item. you can add new Parent/child nodes from within this screen. These need to be associated with a Tax Rate.
Matrix -
If the item has dimensions then you will see a grid as below, where you can then edit the individual prices for the item dimensions.
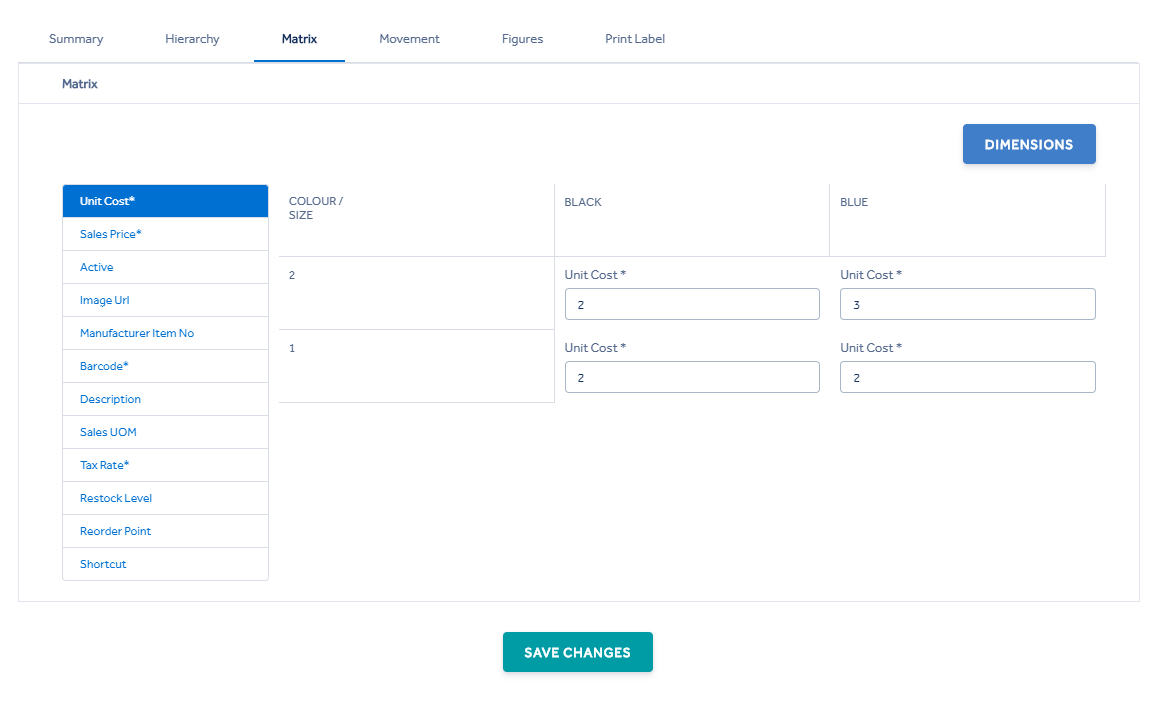
Which you can then apply to 'All', 'Row' or 'Column' ![]() (this is only available within items with dimensions)
(this is only available within items with dimensions)
Shortcut - Setting an item as a shortcut will show this item on the POS under the shortcuts hotkey see (Item Shortcuts).
It is possible for you to edit the sequencing of your dimensions and their attributes using the Dimensions button in the Matrix Grid. 
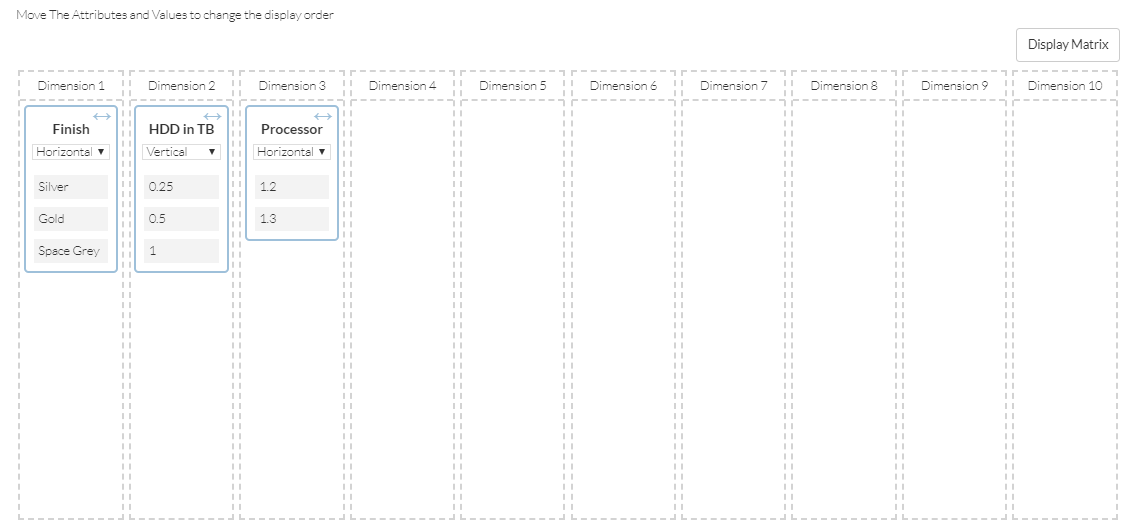
You can:
- Switch which axis a dimension appears on
- Drag the positioning of each dimension by dragging the dimension header
- Resequence individual attribute values by dragging them up and down the list
Remembering to save your changes.
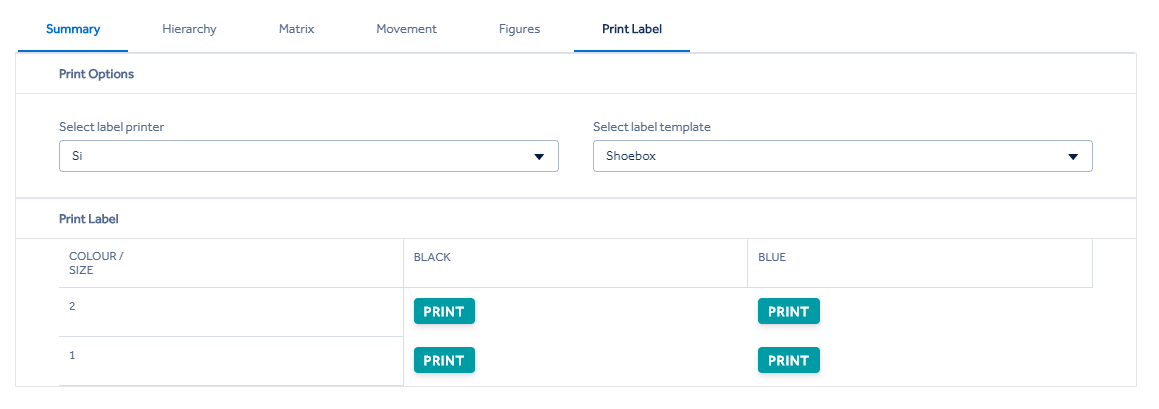
Label Printing -
The Print Label Tab is where you can print Barcode Labels. Use the dropdown to choose your Connector and Label Template (Which you can configure in the backoffice) and press the Print button next to the items you want to print.
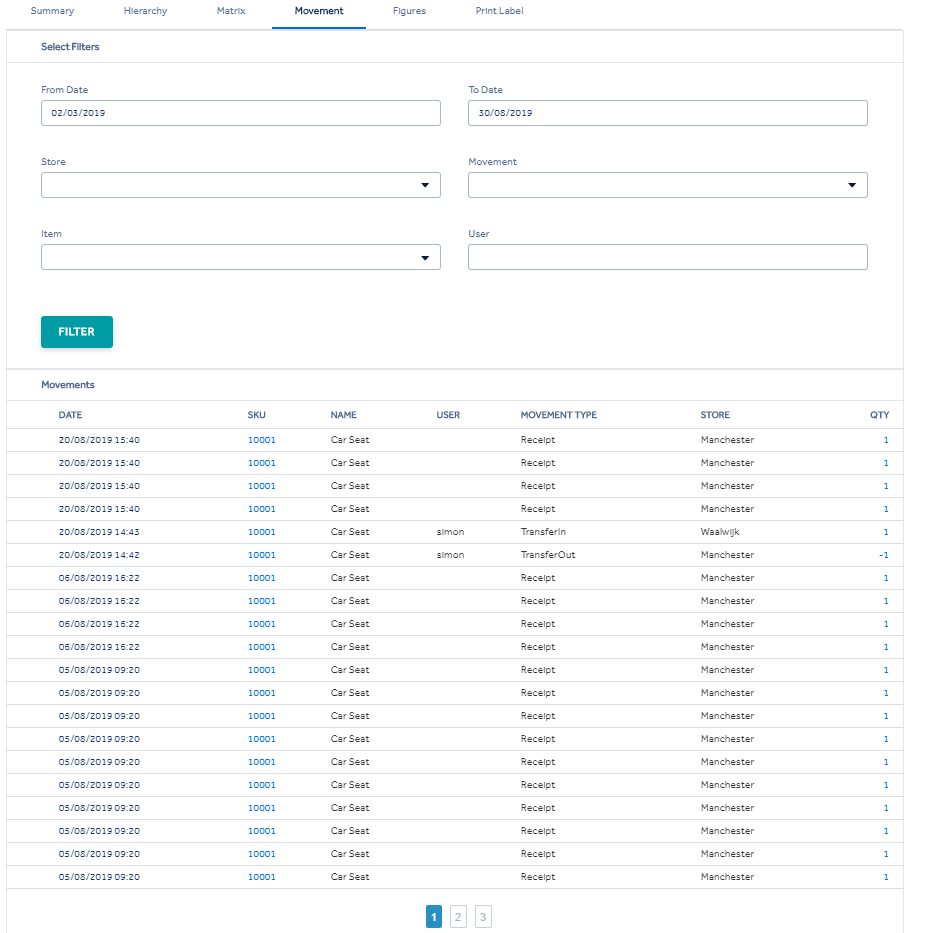
Movement -
This section shows all the movement on the item, sales returns, transfers and purchase orders between the two dates selected. This can be broken down by store, type of movement and item.
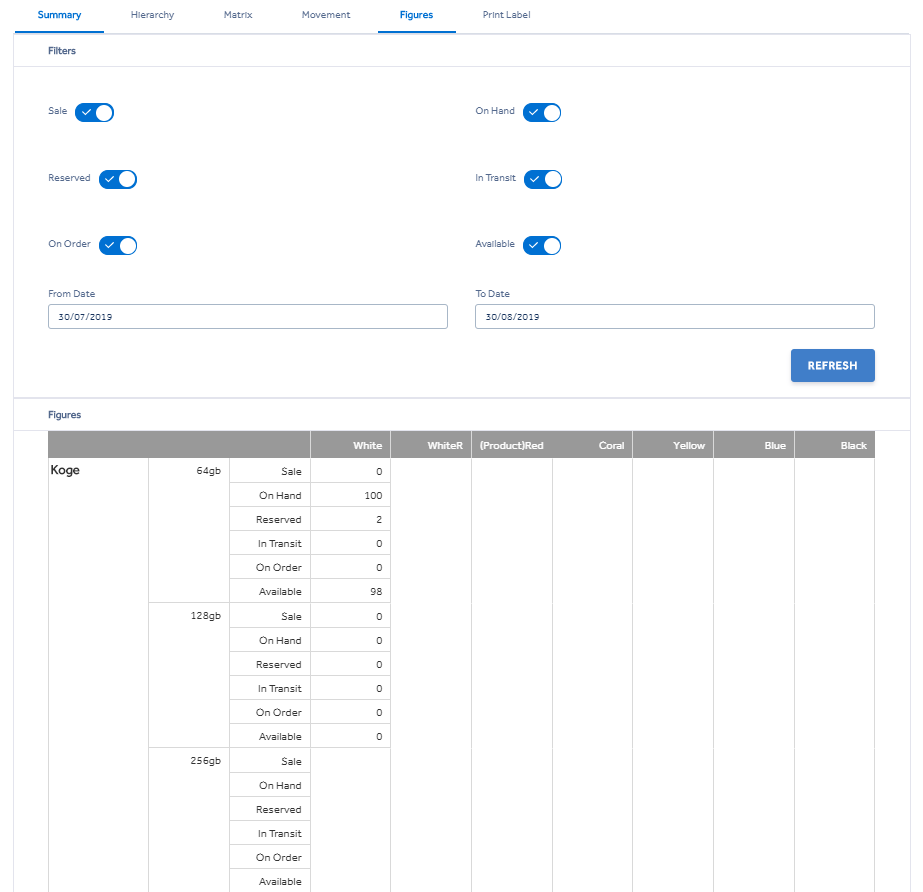
Figures -
Figures tab allows you to view the items history. Select the options that you require and then click refresh and the grid below will update.
Sale (Been Sold between the dates selected)
On Hand
Reserved
In Transit
On Order (Purchase order)
Available