Method 2: External CSV Count Import File
This option is typically used to import a stock file which has come a stock taking device or 3rd party program. The file will be a CSV format with a file extension of .csv.
Format Explanation - During the import process you will be prompted to confirm the format of the file.
Delimiter Used in File: [The character used to separate each of the fields of data in the file].
, (Comma)
; (semi colon)
‘ (single quote)
| (pipe)
[Tab]
Are the Cells surrounded by single/double quotes?
‘ (single quote)
“ (double quote)
None
Column Index that Contains the Barcode:
Use the drop-down to select a column number.
Column Index that Contains the Count:
Use the drop-down to select a column number.
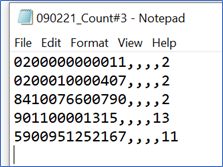
Example of an External CSV Count Import File.

Step 1: Importing an External Count CSV File.
Create a new stocktake or open an existing one.
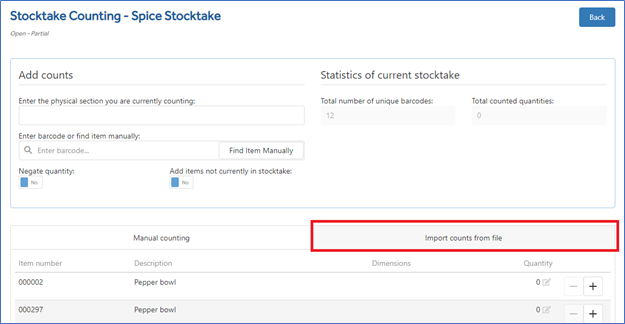
Click on the Count button.

Click on Import Counts from File.
Click on Import Count File to start downloading a Stocktake Count Import Template.

Click Browse for File and browse to the external file you wish to import.
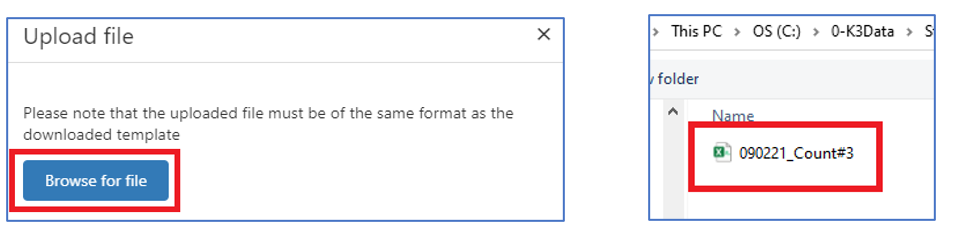
Check the correct file shows on the upload screen.
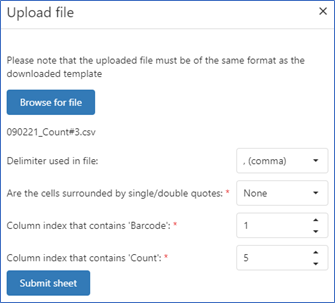
Set the import format parameters which matches the format of your import file. Example file above is:
Delimiter = Comma
Cells Usage = None
Barcode Column = 1
Count Column = 5
Submit Sheet to proceed.
The template is added with a status of Validating Data. [May show briefly as Data Parsed].
Use the Refresh List to check if the validation process has completed.
If successful, Status changes to Data Validated.
If unsuccessful, the status will change to validation failed.
See the section Validation Failed on what to do next.

Click the Tick in the Actions box to add the validated counts.

Add to Existing Counts - Adds the quantities of this import file to any counts already against an item.
Overwrite - Replaces any counts already against an item with this import file count.
Cancel - Cancels the import.
Add Items Not Currently in Stocktake - Tick On to add items which are not in the original stocktake list, otherwise they will not be added.

The status of an import will show as Importing to Stocktake whilst counts are being updated.
Use the Refresh List to check if the import process has completed.
Import is complete when Status changes to Imported to Stocktake.


Repeat with another import file or continue adding items manually.