Step 4 Importing and Validating Information
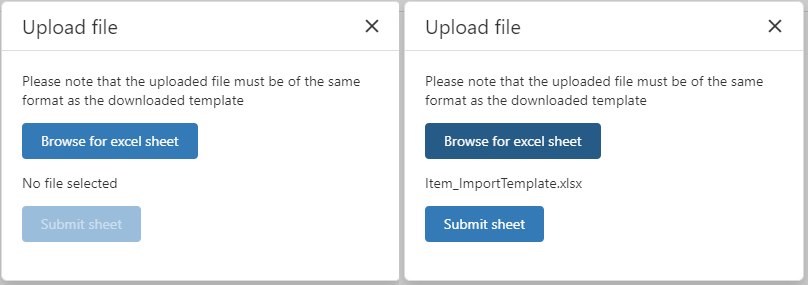
Click on Upload File.
Browse for the Excel Spreadsheet.
Submit Sheet to start the first part of the import process.

Use the browse for Excel Spread Sheet to find the sheet to import, then click submit sheet.

The status “Processing” means the file is being checked, then it moves to ‘validating’. If successful it will move to a status of ‘Validated’ with an Edit Pencil and Tick icon showing in the Actions column.
If there is a problem, it will move to an ‘Invalid’ Status. [See Invalid Status section on what to do next]
If there is no activity after a short period, use the Refresh List button to refresh the page.
Processing and Validation time will vary based on the number of items and lines being imported.

[Optional] Review of Validated items.
When the status shows validated, the Edit Pencil can be used to review any of the items before completing the Import process. Items can be changed using the Edit pencil of each line, or if required items deleted using the recycle bin of each line.
You must choose the ‘Validate’ button again if any changes are made, otherwise use the X to close the page, ready to ‘Complete the Import’.
[If required] Validation Errors - Invalid Status.
Invalid status means there is something not quite right with the data in the spreadsheet. Typically, it is missing information, duplicated information such as the item number, a barcode or dimension variations.
Some corrections can be made at this validation stage without re-importing the spreadsheet, others may require a spreadsheet change followed by another import.
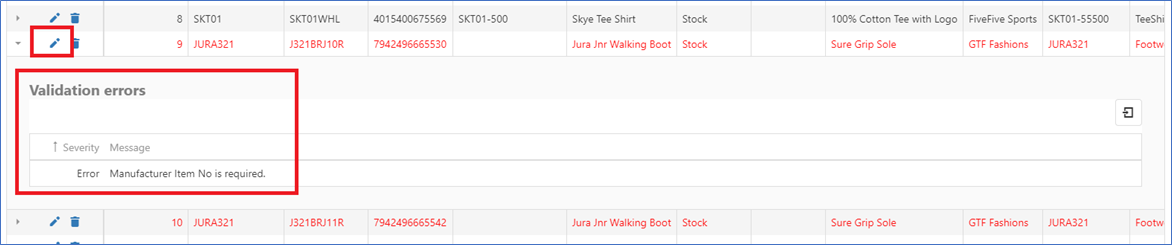
In the Actions column, click on the Edit Pencil to see exactly what the problem is and apply the correction.

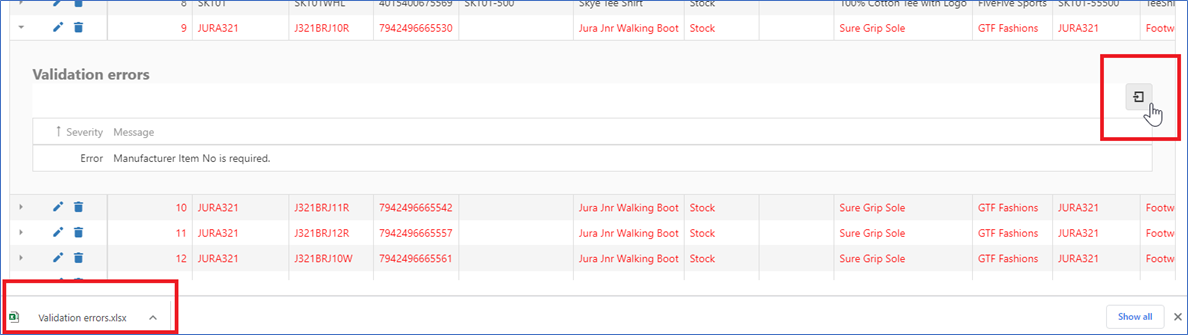
The items showing in RED are the items that require attention.
Click on the down arrow at the start of each line to see the Validation Error message. [There may be more than 1 validation message per line]

In this example the Manufacturer Items Number is missing.
Option 1: Update the spreadsheet and re-import again.
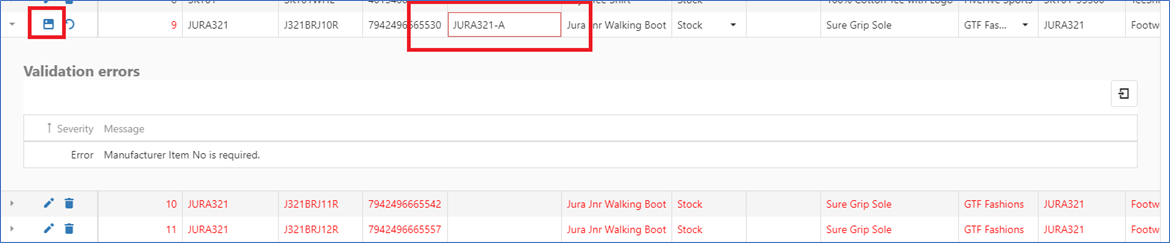
Option 2: Click on the Edit Pencil between the arrow and the recycle bin to add the missing information.
Use the SAVE icon between the down arrow and recycle bin to save your changes for this line.
Repeat option 2 for all other lines showing in Red.
Once all corrections made, choose VALIDATE to re-validate the data.
The status will show Validating then move to ‘Validated’ with an Edit Pencil and Tick icon showing in the Actions column if successful. If there is a still a problem, it will move back to a an ‘Invalid’ Status.
If there is no activity after a short period, use the Refresh List button to refresh the page.
Processing and Validation time will vary based on the number of items and lines being imported.
Continue with the next step to ‘Complete the Import’.


Export Validation Errors - In the event there are a lot of errors, use the ‘Export All Data’ option to export to a spreadsheet for easier identification.
The spreadsheet will be downloaded to the download folder or your specified download location.