Scheduled
NOTE: If you leave the Stocktake section your items will be saved and will be restored when you return to scanning.
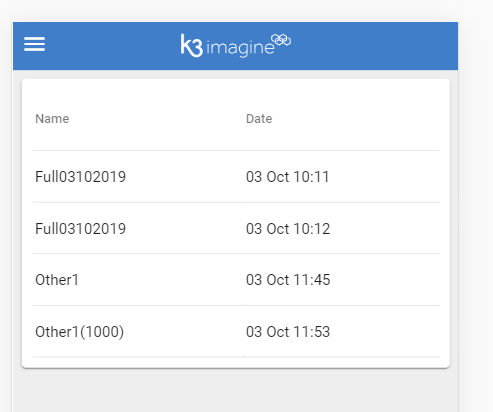
When you select a Scheduled Stocktake you will be shown a list of open stock takes from here you will see a list of previously created open stock takes.
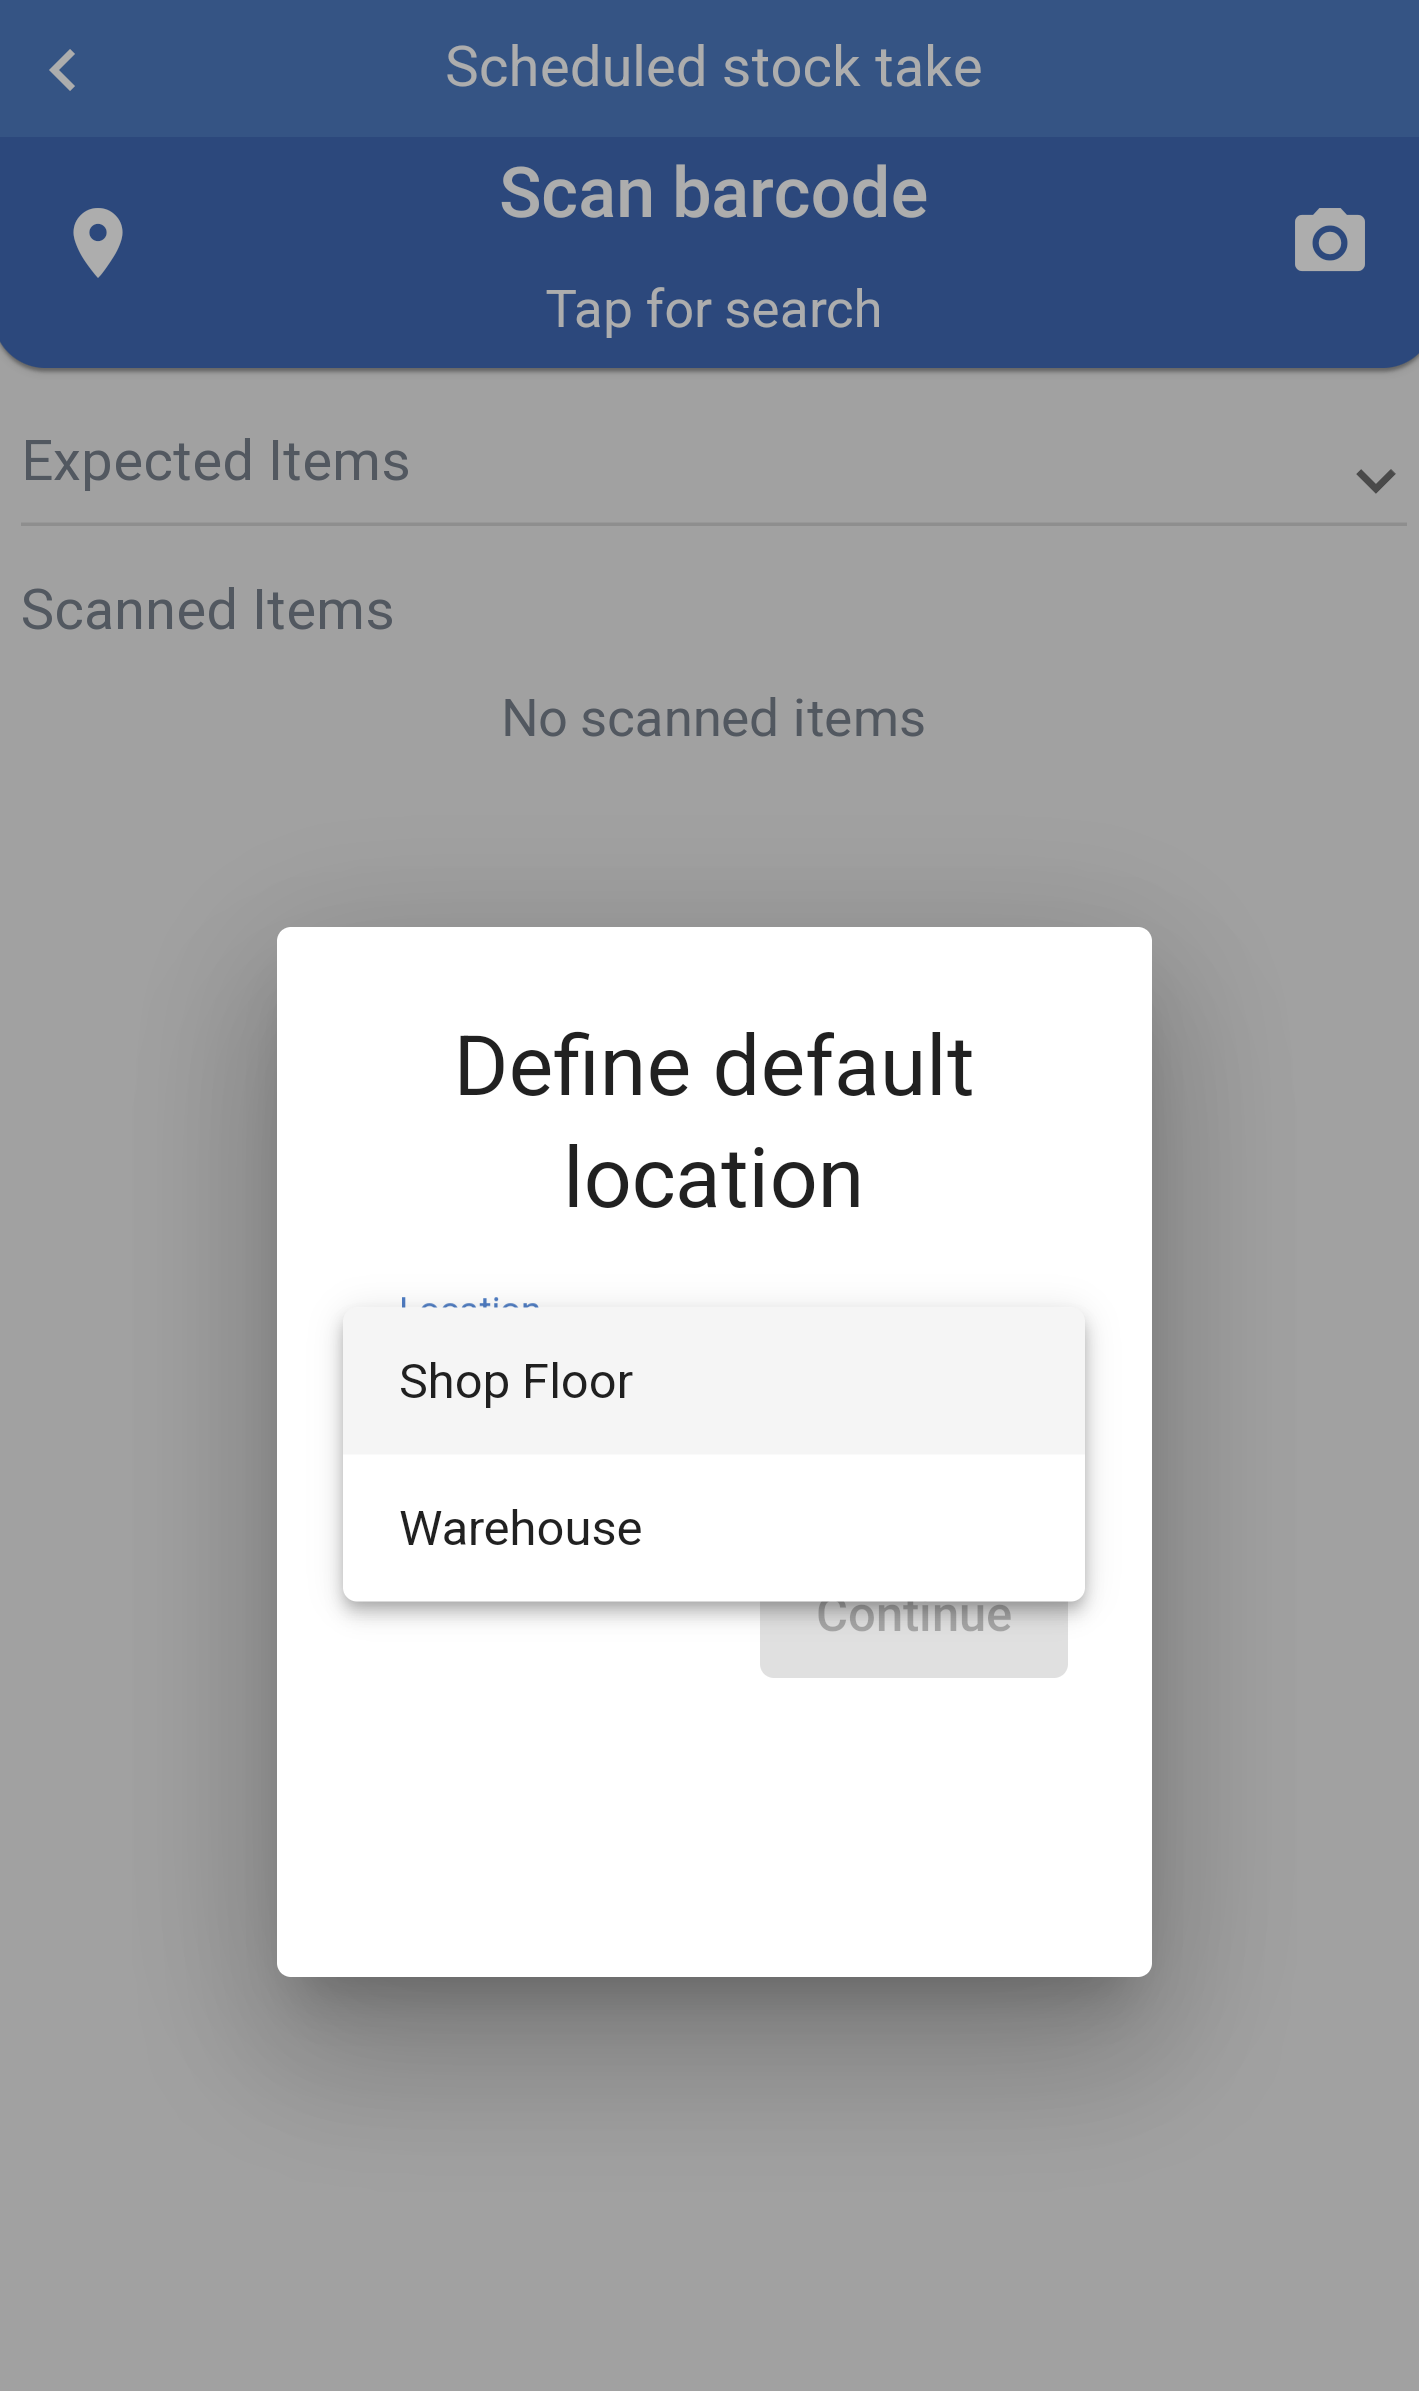
Once a stock take is chosen you will be asked to confirm the location.
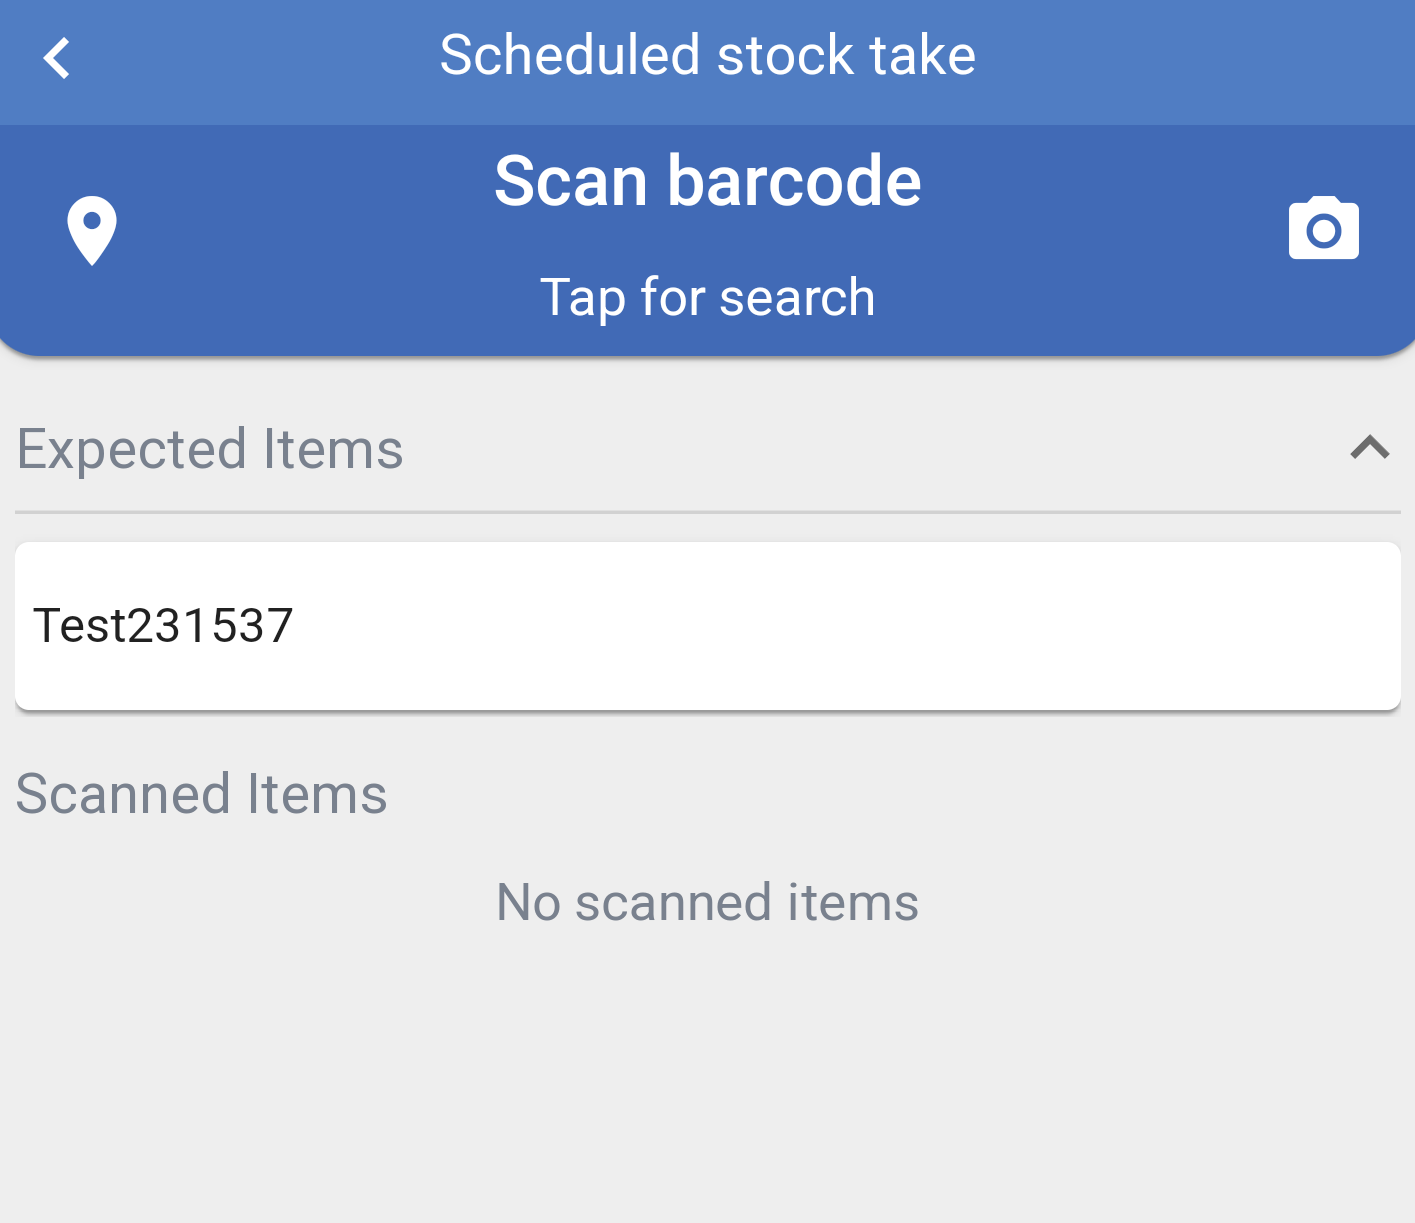
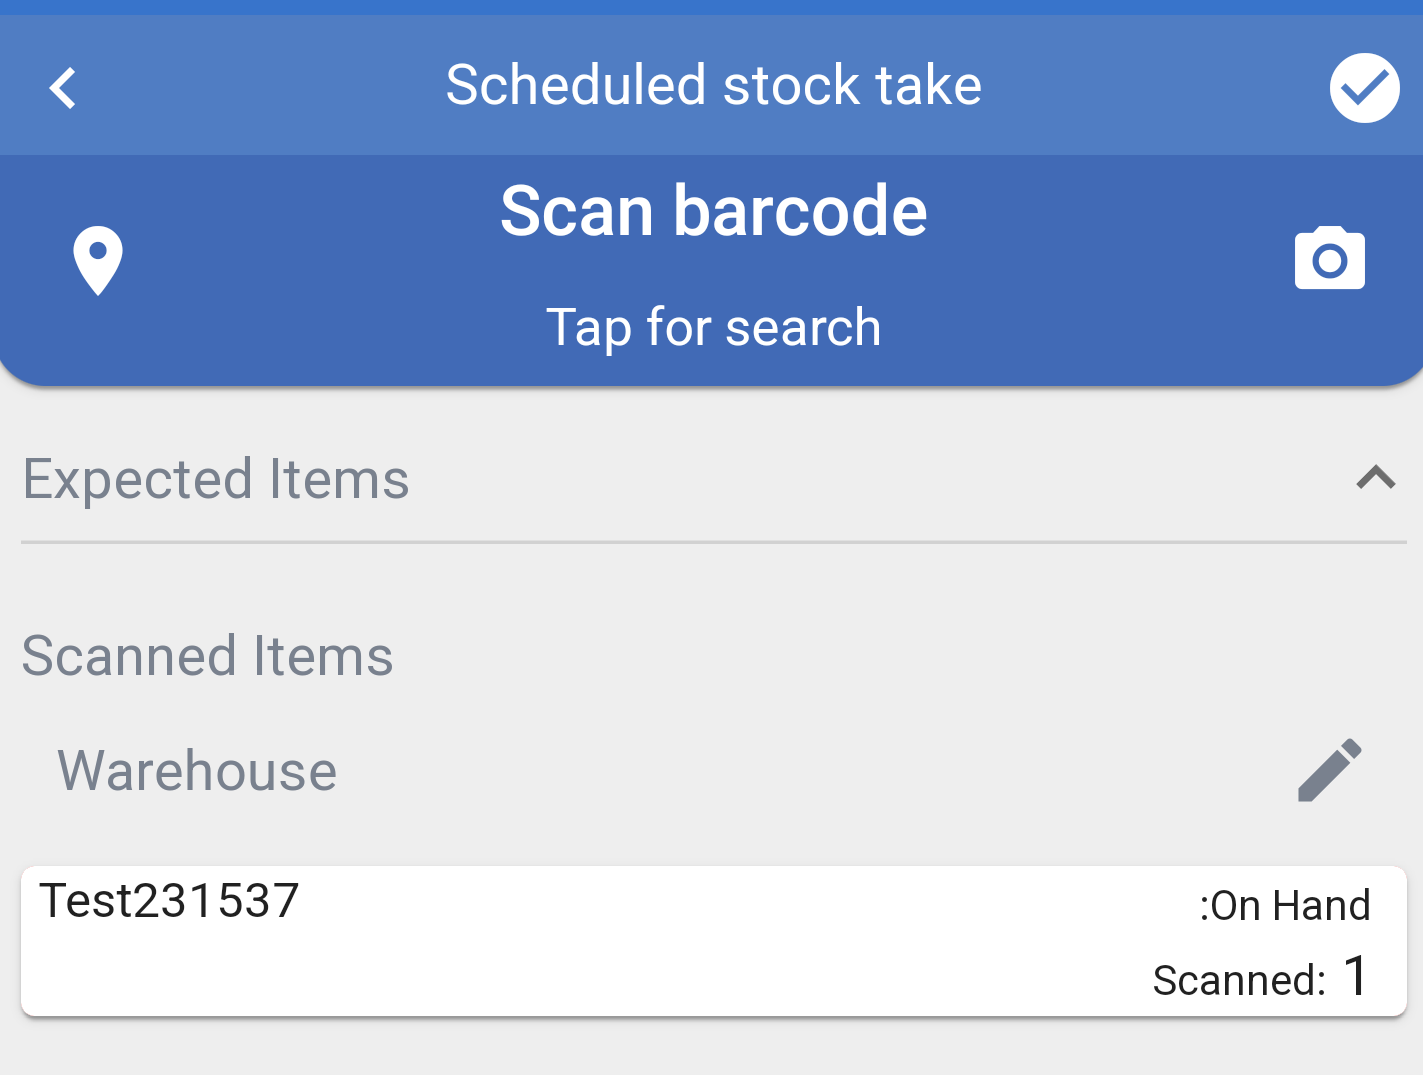
You will then be shown a list of expected items to be scanned on the stocktake.
if you scan an item that is not expected in the stock take you will hear an audible beep and a notification will display.

Once the correct item is scanned it will be added to the list.
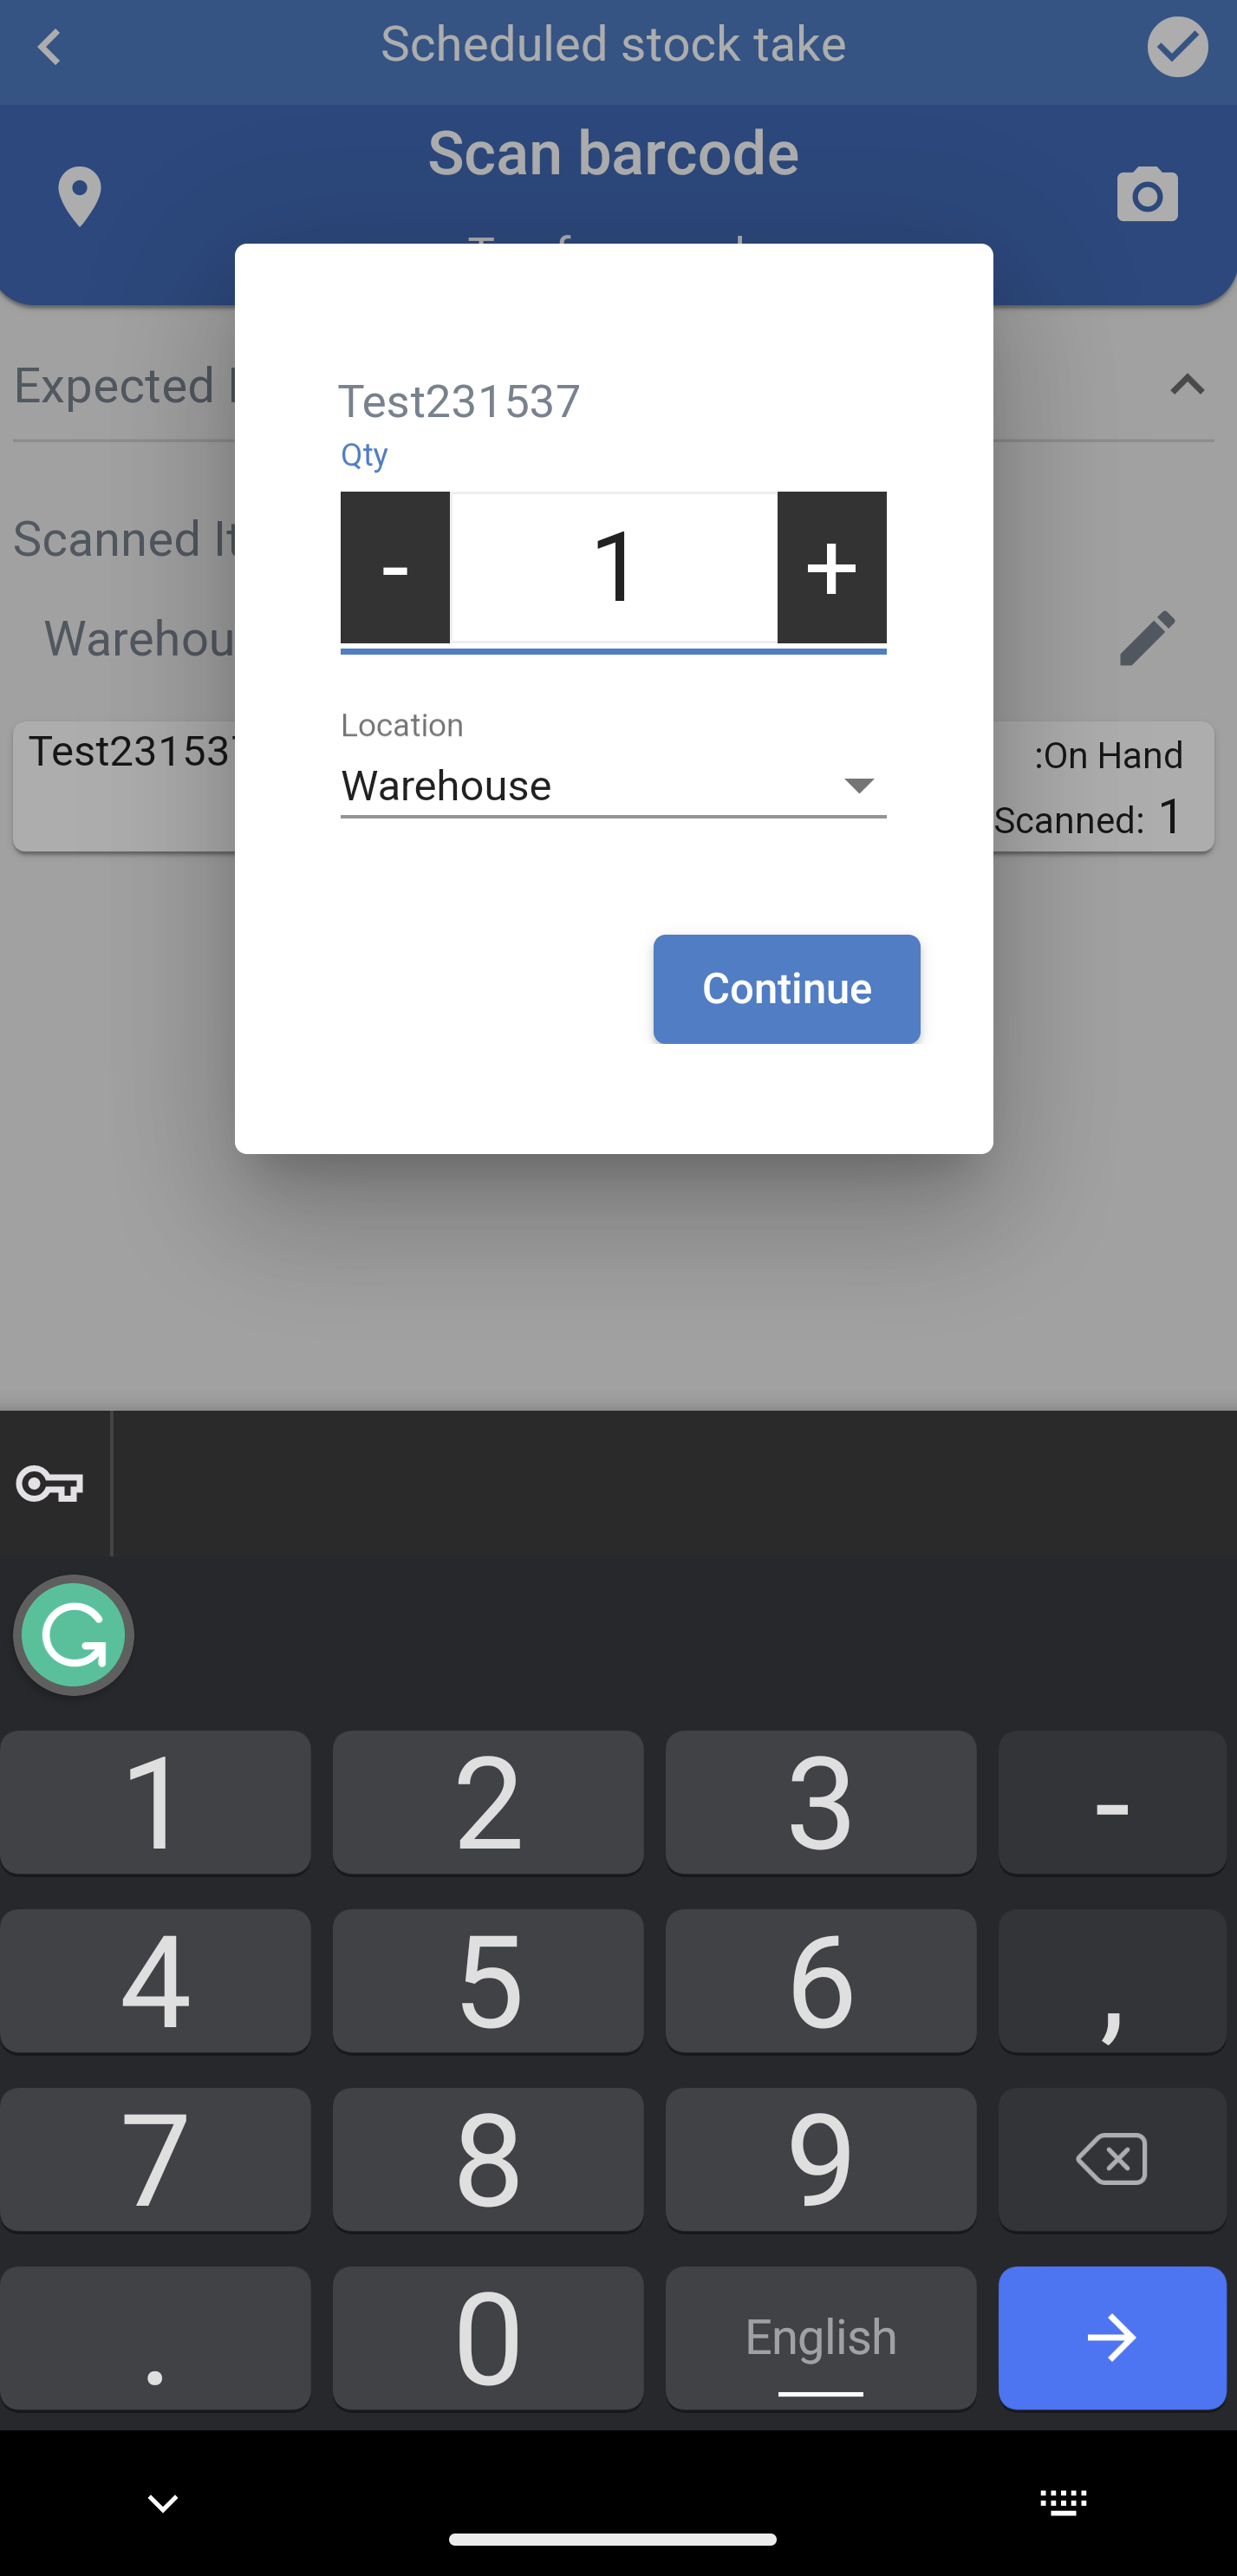
You can alter the quantity if necessary by pressing the line you wish to alter.
You can use the - or + buttons or use the numpad to input the new quantity.
Press continue to add to the stock check.
NOTE: If an error is made you will be able to review previous counts and edit quantities.
Scans are timestamped and grouped by a configurable parameter. So when you scan items with the same barcode they will be consolidated.
When a count has been completed (if you have the correct permissions) they can be reviewed and submitted to Imagine, however quantities are not adjusted at this stage. You will need to use Imagine to commit the count.
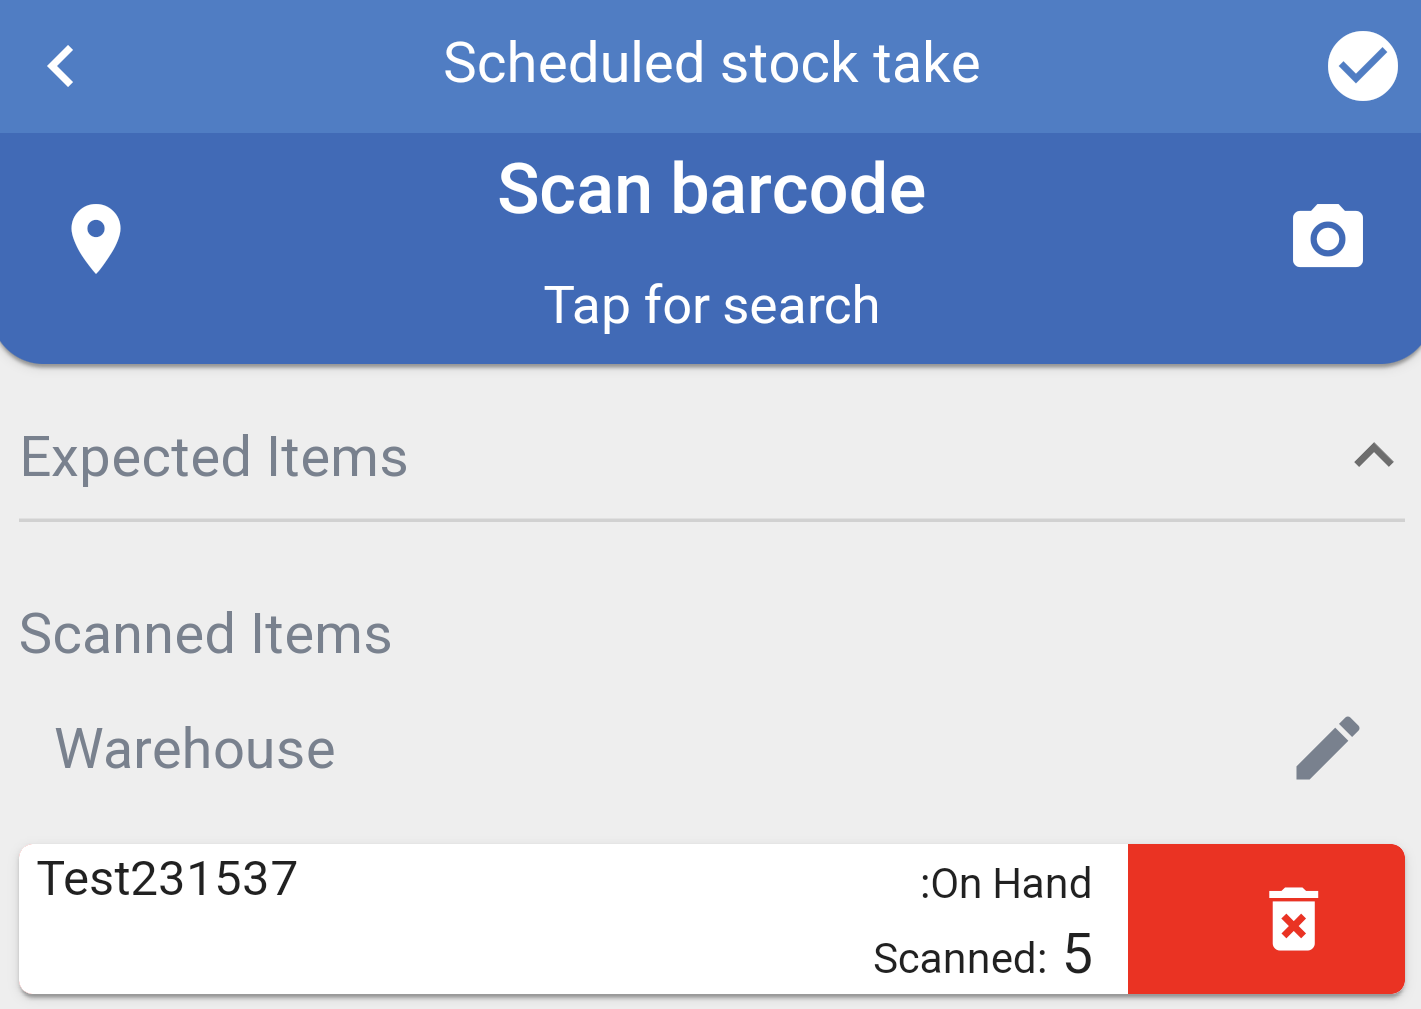
To remove an item from the stocktake list swipe the line to the left and press ![]() to remove.
to remove.
When you have finished scanning the items use the ![]() in the top right hand corner to finish.
in the top right hand corner to finish.
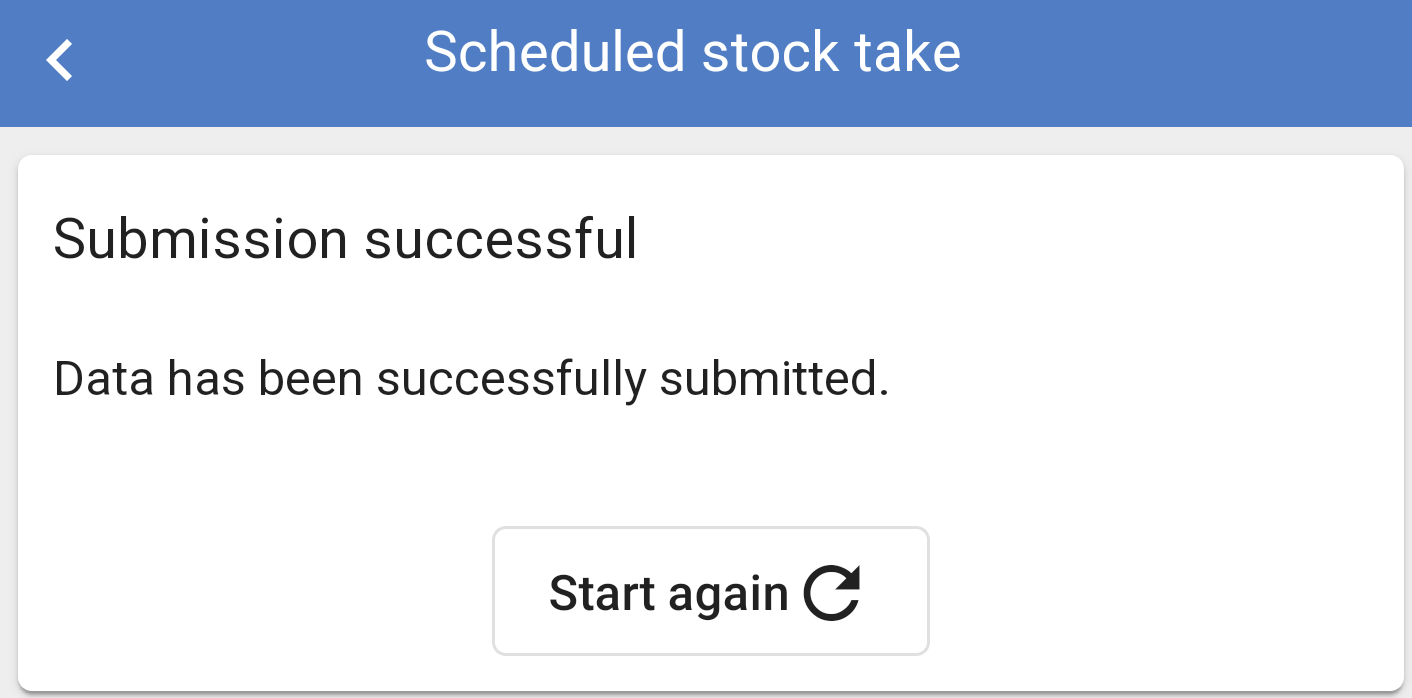
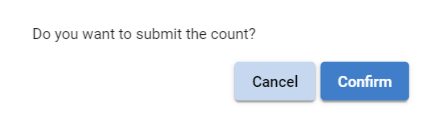
You will be asked to confirm submission of the stock count.
You will get a confirmation of the stock take submission and the number of lines within the stock take.