Custom Attributes
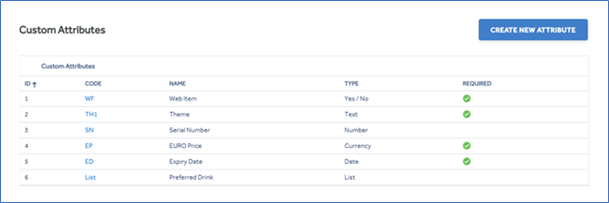
Custom Attributes can be found in the ITEM Management menu.
Custom Attributes are a way to extend the item properties with your own values. This is useful for holding additional information about an item which may be used for identification or reporting.
There are 6 different types of attributes available to be setup. Number, Currency, Text, Date, Yes/No and List. They can be made mandatory or optional for an item.
Types:
- Number: A number up a max length of 15. The number can include a decimal point.
- Currency: Standard Currency values formatted to 2 decimal places
- Text: Free text field
- Date: Date field formatted as DD/MM/YYYY. Calendar selection available.
- Yes/No: This is a Toggle type box with 2 options. Yes or No.
- List: A list of answers/choices is created and is then made available to the user as a drop-down list. Only 1 can be selected.

Create a New Custom Attribute
Click on Create New Attribute and complete the fields as required.
- Code: This can be anything you wish, but must be unique.
- Name: This is the description of the Custom Attribute.
- Type: Use the drop-down to select the type required. If Choosing List – See extra setting below]
- Required: Click on the button to set as mandatory [blue with a tick] or optional [grey with no tick]
- Save: Save all details.

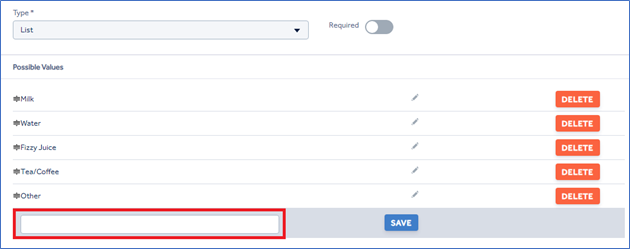
For the type LIST, there are additional value fields available.
- In the Blank text box, enter the description of the value and press Save to save the value entry.
- Remember to use the main Save button for the actual custom attribute.
All values in the list will show in the drop-down box on the item.

View of how it appears on the item.

Edit a Custom Attribute
From the custom attribute screen click on the attribute to edit, then amend the details as required. Remembering to Save any changes.
To edit one of the List values, use the Edit pencil, change the description, then Save the value again.
- Remember to use the main Save button for the actual custom attribute.

Note: The Type field cannot be changed as there may be values against items already.
Delete a Custom Attribute
From the custom attribute screen click on the attribute to delete, then choose the Delete button top right of the screen.

To Delete one of the List values, select the Delete button against the value.
- Remember to use the main Save button for the actual custom attribute.
