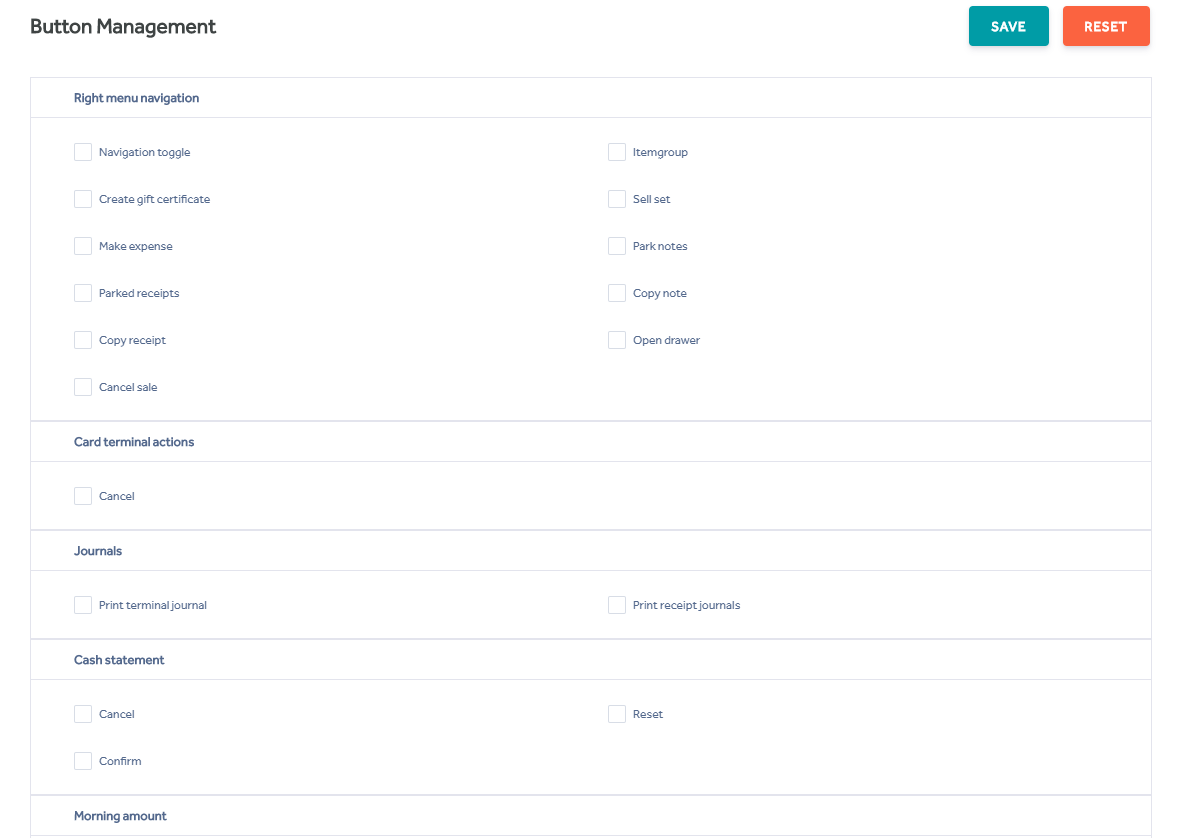
Button Management
Button Management (along with Clerk Roles) is a way to manage the enabled or disabled state of a button for a group of clerks.
POS Admin - Button Management is a way to control access to POS functions at a shop level, whilst Back Office - Clerk Roles controls groups of Clerks access to POS functions.
Clerk Roles will take precedence over settings in Button Management. If a clerk has no role set, then the state for a button will be taken from the shop set via Button Management.
Within the Button Management (and Clerk Roles) many buttons are labelled with text. Where this is the case the button option to enable or disable will be the same as the button label shown on the POS. Where a button is shown with an icon only in the POS, throughout this section a representation of the button and its location will be shown to help you navigate to the right option.

POS Layout
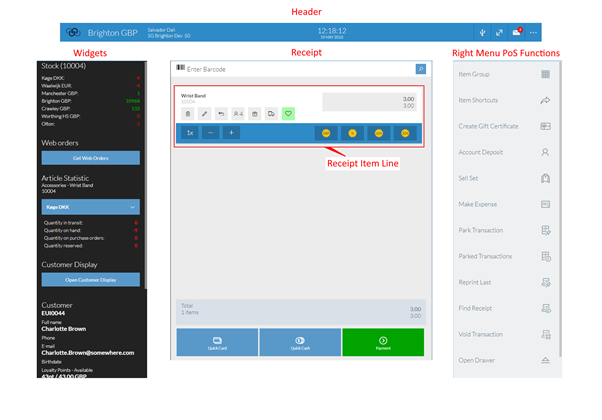
The Button Management (and Clerk Roles) sub menus can be broken down into logical areas. In the diagram below the POS has been split into key areas. Understanding these key areas will assist you when selecting the appropriate button to manage.
Header - Displays notifications, date, time and store / clerk information.
Receipt -This is where you interact with items for sales and other functions within the POS.
The Receipt Item Line- This is specifically the Receipt screen when you have added an item to the POS, rather than an Item Group, Expense, Gift Certificate, Account Deposit or Set.
Widgets - The function of Widgets can be enabled and disabled by your K3 representative, account manager or support staff.
Right Menu POS Function - This is where you interact with day-to-day functions within the POS that are not directly related to finding items in the database.
