Item Info
Item Info is used to add additional details to an item at the POS, or to gather additional information about the purchase of the item.
Some examples of the Item Info usage are:
- Help the clerk provide better information about items to the customer.
- Remind the clerk about up-selling or cross-selling opportunities.
- To advise the customer about the item they are purchasing.
- Check the customer’s age
Examples of gathering information to give insights into your customers and business or about the sale are:
- Ask the customer for their consent for email promotional material about my business
- Gather anonymous and unobtrusive demographic data about your customer base i.e. Male/Female, Age Range, Individual/shopping group etc.
The data gathered within the Item Info can be recorded against the transaction (detail/header) so that it can be reported on later.
Item Info overview
After clicking on Item Info you will be presented with a list of already created Item Infos.
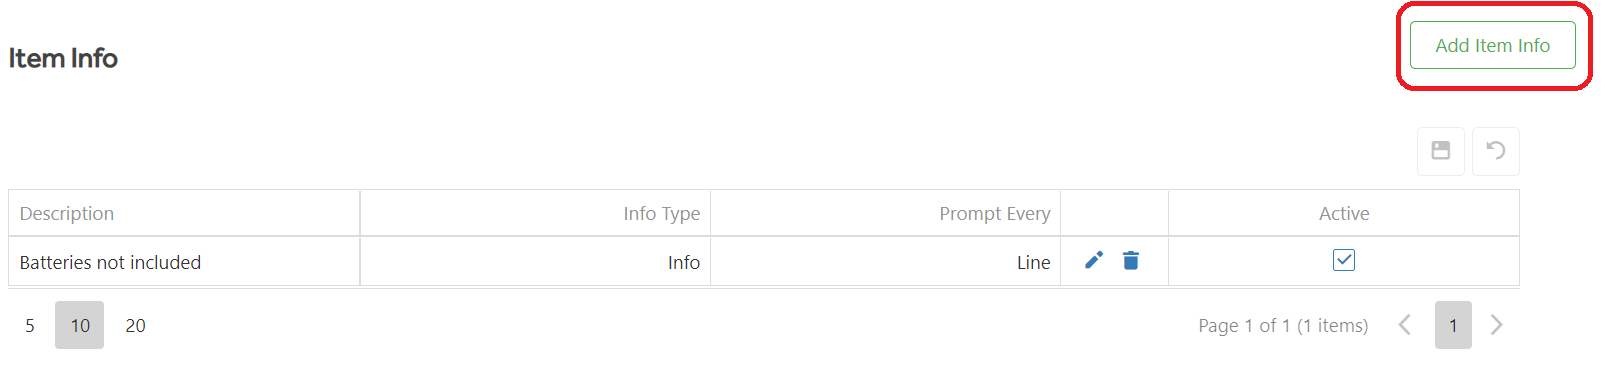
Add Item Info button - Clicking this takes the user to the Item Info creation screen,
Edit button ![]() - This allows any created Items Info to be edited.
- This allows any created Items Info to be edited.
Delete button ![]() - Deletes the Item Info. An Item Info should only be deleted once it is no longer active.
- Deletes the Item Info. An Item Info should only be deleted once it is no longer active.
Active check box - Allows the user to assign a tick and then save making the Item Info active or inactive. Newly created Item Infos are made active by default. An Item Info should not be deleted until it is inactive.
Prompt Every - This is the stage at where the prompt will show to the cashier.
Adding Item Info
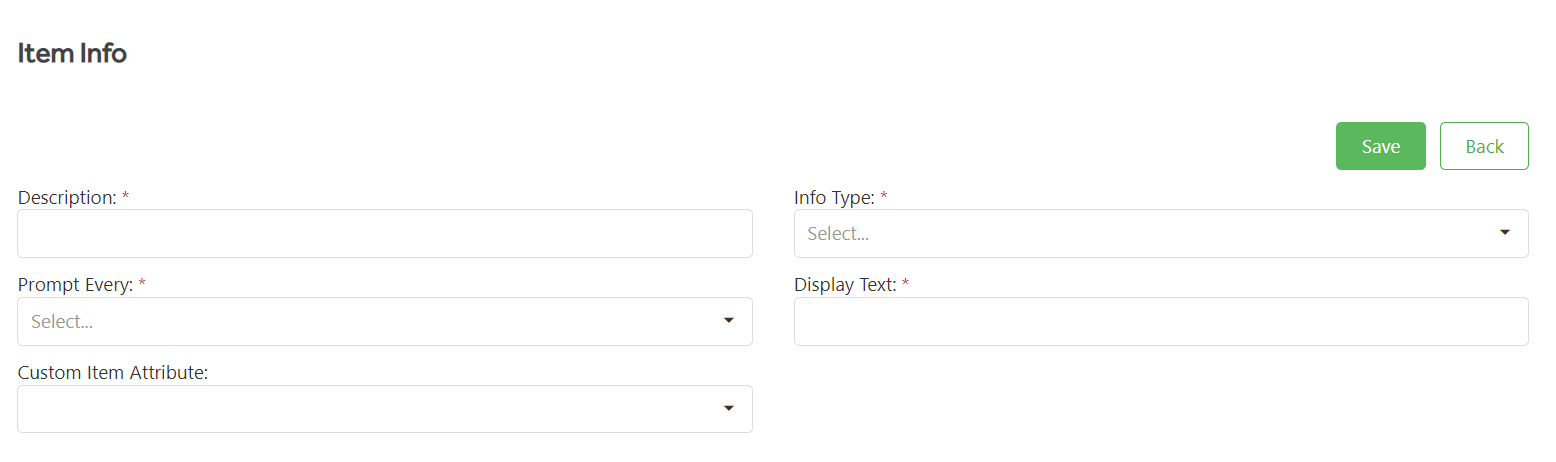
Description - Displays the description for any Item Infos that have been created
Info Type - Displays the info type of any Item Infos that have been created. This will be either Message or Question
Prompt Every - Displays the chosen Prompt frequency on POS for any created Item Infos, this will be either Line or Transaction.
Display Text - This is the prompt/message text which will be displayed on the PoS
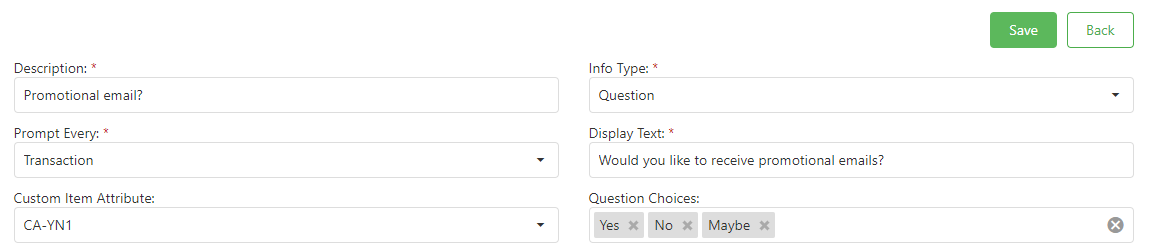
Custom Item Attribute - Drop down to select the Custom Item Attributes which will be the ‘trigger’ to initiate the item info at PoS. NOTE. Custom Attributes are the method of linking the item to the Item Info. The drop down will list only custom attributes which have a Yes/No type set
Question Choices - this is will only show when the Info Type is set to Question. Enter in the options a clerk can respond with i.e. Yes No Maybe. Hit Enter between choices to save each one
Complete the boxes as required
Save button - Saves changes made whether the message is active or not
Transaction - Means show the message or ask the question once only in any transaction when that same item is scanned. i.e. If I buy 3 of the identical item I only want to remind the clerk to suggest batteries once not 3 times.
Line - Means show the message or ask the question every time the item is scanned. This may be because we need to message or collect information about each individual item line e.g. a sale of a pair of shoes, “Confirm matching Pair !”
Click Save when complete or Back to cancel any changes
Linking Item Info to an Item - Once the Item Info has been created and saved, you will then need to link it to an item. As noted above, the Items Info must be linked to a Custom Attribute. The Custom Attributes Tab page shows how to link a Custom Attribute to an item. When linked and the item is added to the transaction screen in the POS, the Item Info will display.