Installing the Connector
- Before connecting any of the Printers ensure there is paper loaded.
- Connect the Printer to the Connector using the Serial connector and USB to Serial adapter.
- Connect the Cash Drawer to the Printer using the DK cable into the DK port on the printer.
- Connect the Network cable from the Connector onto your network. Your network must support DHCP and allow the device to be assigned an IP address that has outgoing Internet access.
- Connect the power to the connector.
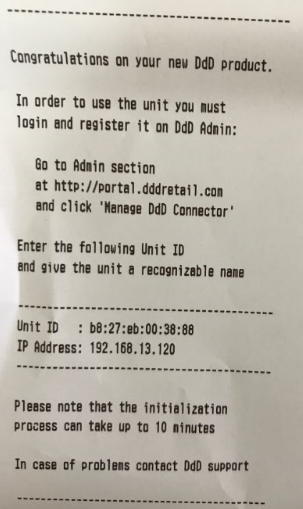
After a few minutes, the Connector will connect to the Internet, check into the K3 servers, and then print a status report. It will give you the Unit ID and IP address so you can configure this in the Portal.

Visit http://portal.k3imagine.com use the Admin module > K3 Connector Manager to set up the connector.
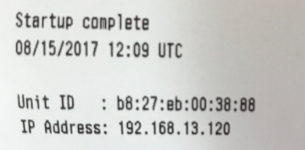
NOTE: When adding a new connector and configuring it to a store , it may take up to 10 minutes to complete. When it has finished, you will receive a startup notification printout.
Should the Startup Complete slip print without an IP Address then you should check you network settings and router. A missing IP Address means the connector has not been issued an IP address automatically.

Changing the K3 Printer Language.
To use a different language on the K3 Printer you will need to set the language within the printer itself by following these steps:
The below is an example setting the language to Chinese
- Download the printer tool found at https://rongtatech.com/RP820_download
- Connect the thermal printer to your computer, take note of the COM port it connects to. You can find this out simply by looking in device manager.
- Start up the PrinterTool.exe then on the first screen configure the printer e.g. Set the COM port to the one it is connected to and hit configure port, set the baud rate to 38400. Hit Then Set Printer.
- On the first tab, set the code page to CHINESE and set the baud rate to 38400, hit “Set” the printer should beep back at you.
- On the “BIG5” tab make sure emulation mode is set to EPSON ESC/POS and language to “Chinese GB 18030” hit set on both of these.
- Back on the first tab again (Base) Hit Self Test, the printer should print out its configuration, and the code page at the top now should read GBK along with some Chinese characters.
- Next unplug the printer and plug it back into your connector, reboot your connector.
- SSH onto the connector and change the docker-compose.yml file add the following configuration to the arm gateway container as an environment variable - “EncodingCodePageValue: 54936”
- Reboot your connector