Adding a New Connector
NOTE: When adding a new connector and configuring it to a store, it may take up to 10 minutes to complete. When it has finished, you will receive a startup notification printout.
Choose which location you need the connector set up for.

If there are no Connectors visible then there is none currently set up for this location.
To add a new Connector click on the ADD DEVICE for your store.
NOTE: You can add multiple Connectors at once if required.
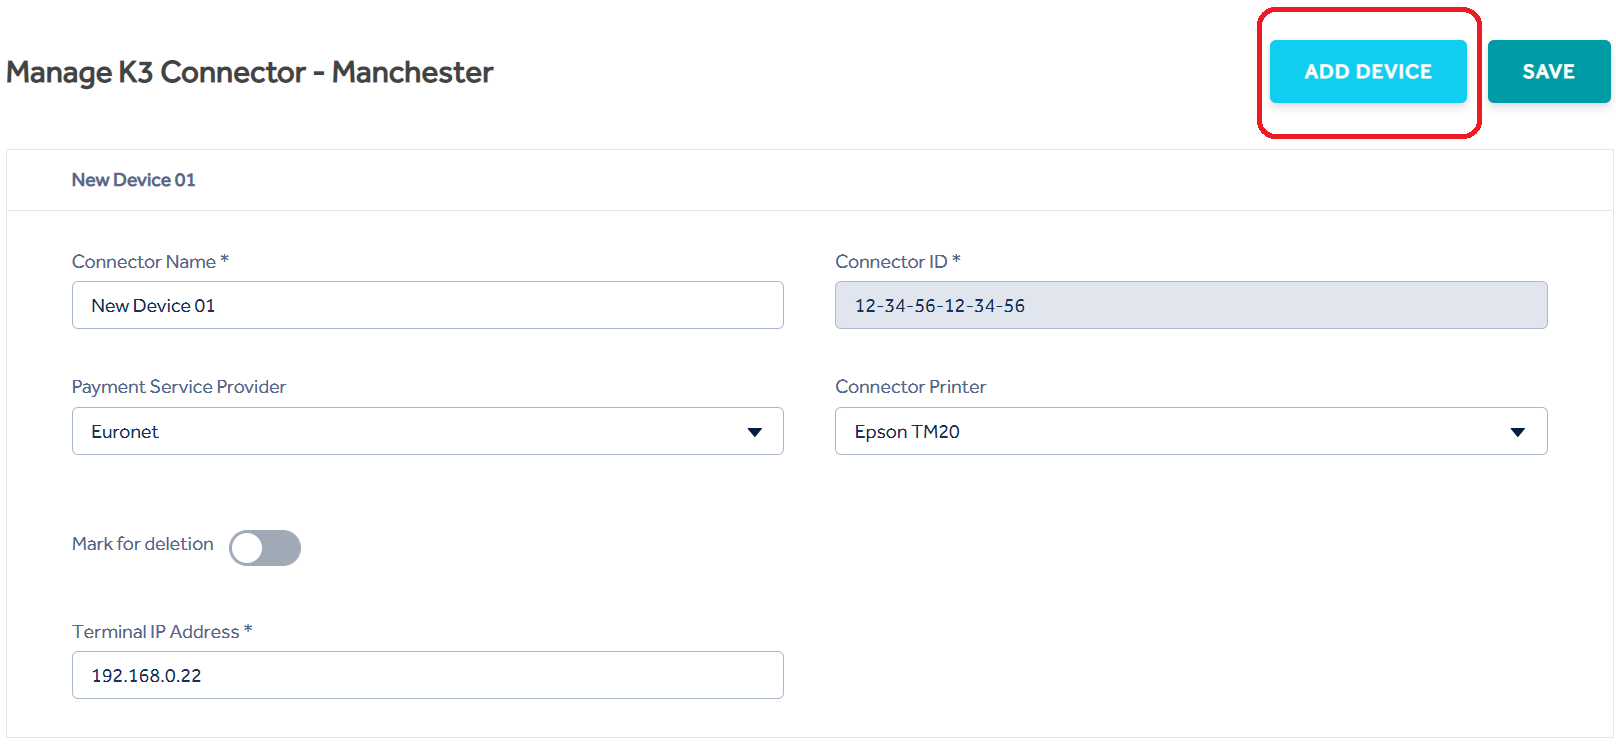
Save - When a new Connector along with the information has been added this will save the options.
Connector Name - This is the name given to the Connector / Device (e.g Front Till 01).
Connector ID - The ID given from the start-up slip which is printed when the Connector is first booted, for more information see @Assembling the Connector.
*The ID must be exactly 6 groups of 2 numerals or letters (0 to 9, A to F) and each pair separated by a -
Connector Terminal - Choose the type of integrated card terminal in use, if there is no integrated card unit present choose the "No payment service provider" option.
Most integrations require the IP address and port number for the terminal.
Connector Printer - Choose from the options for 'DdD' (K3 Receipt Printer) or 'Epson' these options help to determine specific paper sizes and receipt logo printing settings.
Mark for deletion - When set to 'On' the related connector will be deleted from this store when Save is clicked.
Virtual Connector - Reserved for future use.