Assembling The Connector
The Connector is the HUB for all of your connections and software.
Assembly
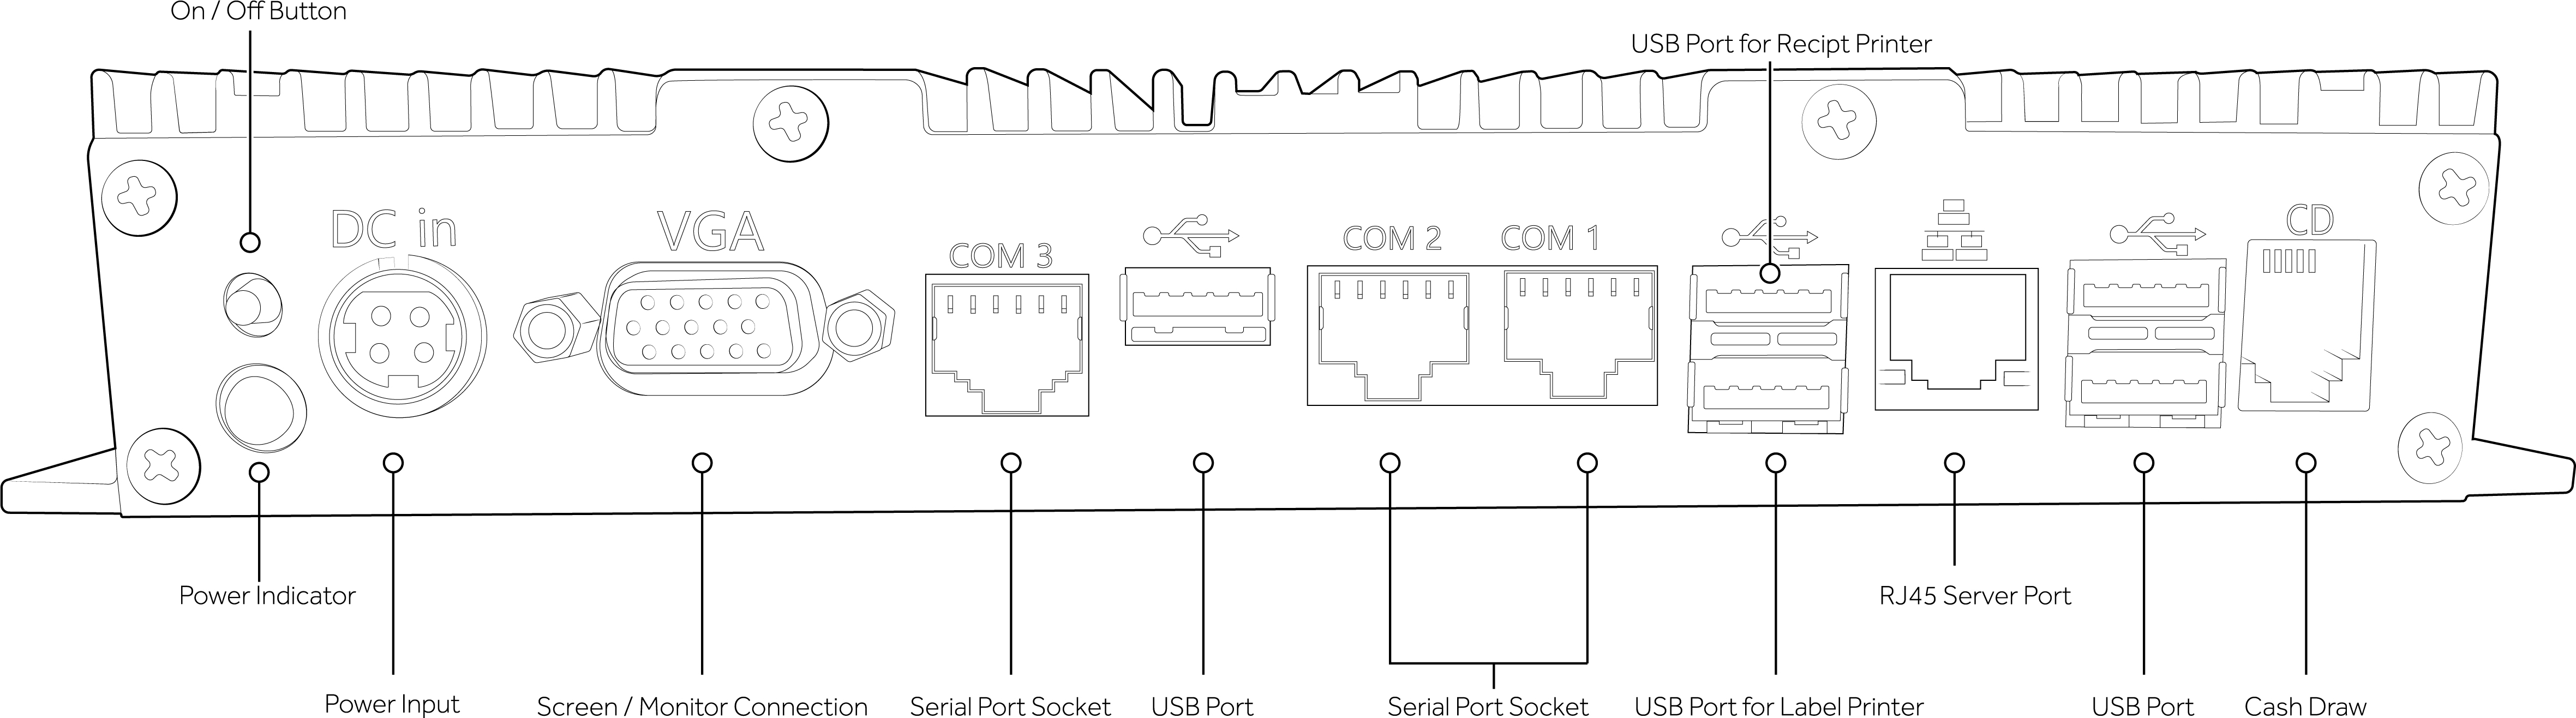
Step 1. Assemble the Power block and plug, and insert the power cable into the DC in port on the Connector.
NOTE: To remove the Power Cable from the Connector pull the sleeve back and remove it, do not force the cable as this may cause damage to the cable and pins.
Step 2. Connect the Printer using the supplied USB Cable.
Step 3. Connect the Cash Draw to the Printer using the supplied DK Cable.
Step 4. Connect the supplied Network Cable from the Connector to your Network (Router).
NOTE: Your network must support DHCP (Dynamic Host Configuration Protocol) and allow the device to be assigned an IP address that has outgoing Internet access.
Step 5. Press the On Button, a blue LED will indicate the Connector is powered on. Give the Connector a few moments to connect to the internet.
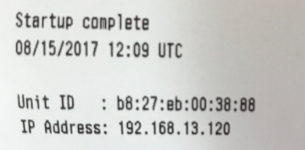
Step 6. Wait a few moments and the Receipt Printer will produce an IP Address (Connector Name) and Unit ID (Connector ID) you need these to add the Connector via the K3 Connector Manager.
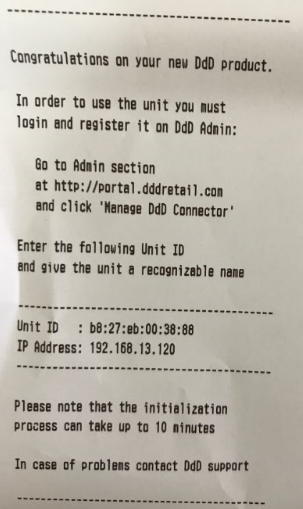
NOTE: When adding a new connector and configuring it to a store, it can take up to 10 minutes to complete. When it has finished, you will receive a startup notification printout.
NOTE: Should the Startup Complete slip print without an IP Address then you should check you network settings and router. A missing IP Address means the connector has not been issued an IP address automatically.